
I’ve been deeply interested in the process of pollinating flowering plants and propagating them by harvesting and germinating the resulting seeds. Pollinating my amaryllis flowers was surprisingly easy and over a 4 month process I’ve come to the point that the seedlings are just starting to grow. It will take another 3 – 4 years before the seedlings are large enough to flower, but I’m a patient person. Sometimes. Ok, only when it comes to plants.
I started with a red lion amaryllis. They’re really common, but one of my favorites because of their size and saturated color.

There are two parts of the flower anatomy that are vital to pollination: the anthers, which are the small bodies that produce the pollen; and the stigma, which is the very tip of the ovary of the plant and receives the pollen. When the flower first opens, the anthers haven’t yet opened to show their pollen and the stigma is still closed in a point. Once the flower matures, the stigma will open and you’ll be able to see three distinct little arms open up and the anthers will be covered in fluffy pollen. The whole process is really simple. You take a small soft brush, cover it in pollen from the anthers, and then brush it on the stigma.


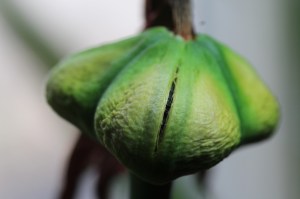
The male cells in the pollen fertilize the ovary, and seeds start to ripen. It’s no mystery if the pollination is successful. You’ll see the base of the flower where it attaches to the stem start to swell as the seeds grow. It’s really neat to watch!

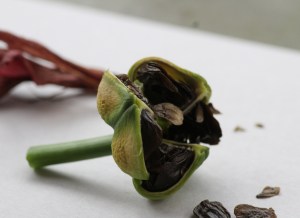
When the seeds are fully mature, the skin of the seed pod will start to turn brown and thin and it will begin to break open. With this amaryllis the full process from pollination to seed harvest took just about three months. I pollinated it in mid-December and the seed pod broke open on February 18th.
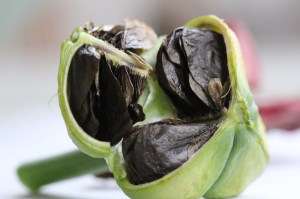
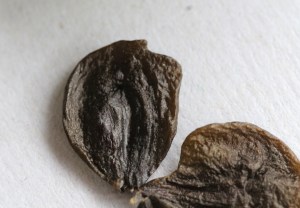
I let the seeds dry for a day and then planted them in a mix of 1 part sand/1 part peat moss/2 parts soil in a plastic container and covered the seeds with about a 1/8″ of the mix and watered well. I put the lid on the container, labeled it, and left it on a seed heat pad with a bunch of other projects. Three weeks later I saw the first signs of germination!

It will take a while longer before the seedlings are large enough to be potted up in their own containers and in the mean time I’m going to keep them warm and under a grow light. I have two more amaryllis plants pollinated right now, so we’ll see if it takes a different amount of time for different plants to mature and germinate…
This has honestly been a great deal of fun and I’ll hope you’ll give it a shot!
Update one year in:
I germinated and kept 15 seedlings and all are doing quite well! I let them go dormant with the rest of the adult plants, and here’s what they look like now.

